
Usage Example Style Guide
Code Style and Formatting Guide
This guide aims to introduce new team members to some standard practices for contributing to splashkit, such as variable declarations, formatting across languages and general do’s and don’ts
Naming Conventions
These are general naming conventions for variables, functions, namespaces and more that should be used when creating usage examples for SplashKit.
1. Variable declarations
Variable declarations for SplashKit usage examples should be in the following format:
| Language | Naming convention | Variable Example |
|---|---|---|
| C++ | snake_case | string variable_name |
| C# | camelCase | string variableName |
| Python | snake_case | variable_name |
See the examples below:
#include "splashkit.h"
int main(){ // Declare a variable with snake_case string variable_name = "This is snake case"; return 0;}using static SplashKitSDK.SplashKit;
// Declare a variable with camelCasestring variableName = "this is an example of camelCase";using SplashKitSDK;
namespace VariableExample{ public class Program { public static void Main() { // Declare a variable with camelCase string variableName = "this is an example of camelCase";
} }}from splashkit import *
# declare a variable with snake_casevariable_name = "This is snake case"Other guidelines when creating variables:
| Do | Don’t |
|---|---|
| Use descriptive variable names | Use i, x, val in main logic |
| Use variables for multiple use values | Declare a variable for one time use |
| Use proper types for variables | Use types such as var and float |
2. Function and Methods
When calling and naming functions and methods using SplashKit we do the following:
| Language | Naming convention | Function/Method Example |
|---|---|---|
| C++ | snake_case | refresh_screen(60) |
| C# (Top-Level) | PascalCase | RefreshScreen(60) |
| C# (Object-Oriented) | PascalCase | SplashKit.RefreshScreen(60) |
| Python | snake_case | refresh_screen_with_target_fps(60) |
3. C# Namespaces (Object-Oriented)
The namespace for a usage example in C# (Object-Oriented version) should be written in Pascal case, and will follow the convention of: The name of the function being demonstrated, with the word “Example” added on the end, also written in Pascal case.
For example:
using SplashKitSDK;
namespace DrawRectangleExample{  // ...}
4. Window Names
When using windows to display any graphics the window name should be a description of what is happening on the window rather than the name of the function you are displaying.
| Good Window Name | Bad Window Name |
|---|---|
"Colourful Starburst" | "Draw Line" |
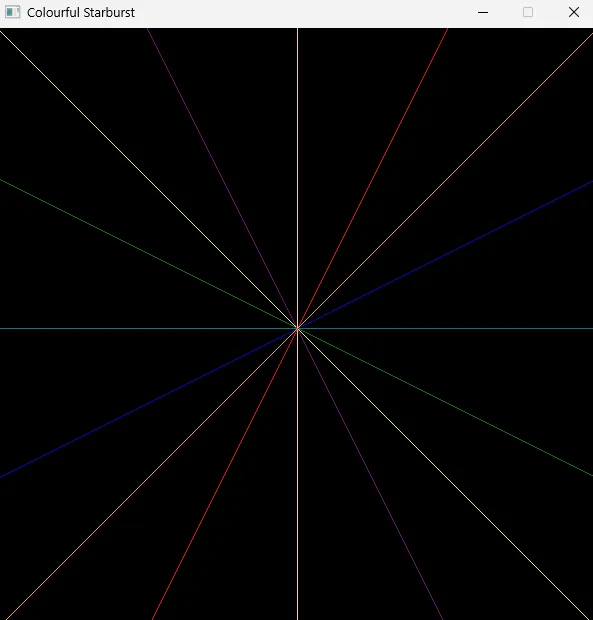 | 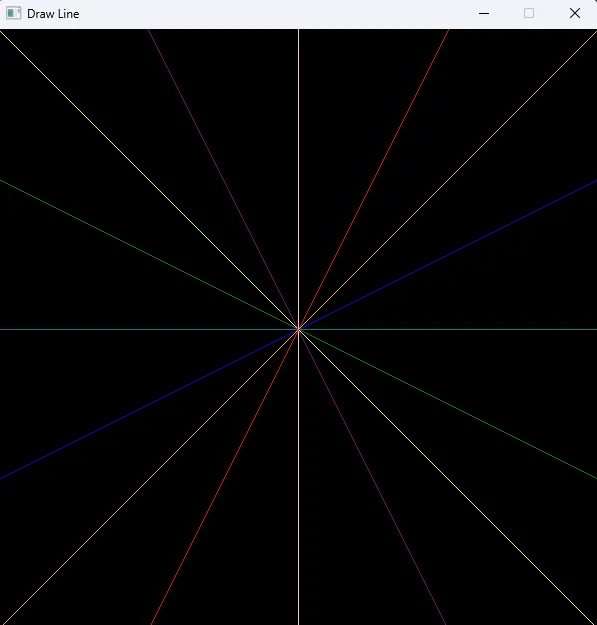 |
Formatting, Structure and Readability
Code Comments
Code comments should be used to explain the why behind code, not the what. Code comments should be clear and concise
A good Comment should explain the intent or purpose A bad comment will state the obvious
| Do | Don’t |
|---|---|
// Draw rectangle to window | // Call the DrawRectangle function |
// Wait for user input | // Hold program to wait for user to press any key before the program continues |
| Use comments for complex or non-obvious logic | Use comments to repeat code literally |
| Use comments for group of code or code block | Use comments for only the line below the comment |
C# Example
Good comment example:
// End the game if the player runs out of healthif (playerHealth <= 0){ WriteLine("Game Over");}Bad comment example:
if (playerHealth <= 0){ // Call WriteLine when health reaches 0 WriteLine("Game Over");}Braces and Indentation
- Braces: Place braces (curly brackets) on the line following the declaration.
- Indentation: Between any new pair of curly brackets (
{,}), write your code 4 further spaces in from the left.
Do:
int main(){ // ...}Don’t do:
int main() { // ...}If Statements
- The if statement condition should be on its own line.
- Use braces, even if just 1 line below, as this is easier for beginners to read.
Do:
if (mouse_clicked(LEFT_BUTTON)){ x -= SPEED;}Don’t do:
if (mouse_clicked(LEFT_BUTTON)) x-= SPEED;Graphical Examples
- If your program is using a Graphical Window, any text information should be displayed on the Window.
- Do not use terminal outputs when using a graphics window in your program.
Looping
- Do not use infinite loops, such as
while(true), as this is poor practice. - Instead, use a loop condition that is defined by a boolean function, such as
while (!quit_requested()).
Use simple code
As SplashKit usage examples are targeted to beginners, so it’s important to keep the code as simple and readable as possible.
Avoid using advanced features such as:
- Ternary statements/operators (
condition ? value-if-true : value-if-false), and instead, stick to traditional if/else statements.
C# OOP vs Top Level
Understanding the Differences Between Top-Level and OOP Styles
Top-Level Statements:
- Top-level statements allow you to write C# code without explicitly defining a class or
Mainmethod. - Uses the directive:
using static SplashKitSDK.SplashKit;, so SplashKit functions are called directly, such asWriteLine("Hello!");.
Object-Oriented Programming (OOP):
- OOP-style C# code requires defining a
Mainmethod inside a class. - Uses
using SplashKitSDK;, meaning all SplashKit commands are prefixed withSplashKit.(e.g.,SplashKit.WriteLine("Hello!");).
Some key differences
Some key differences to note when converting between OOP and top level statements are that OOP should be seeking to highlight the objectivity where possible.
Note the code examples below:
// OOP Codeusing SplashKitSDK;
namespace DrawRectangleOnWindowExample{    public class Program    {        public static void Main()        {            Rectangle rectangle = new Rectangle { X = 100, Y = 100, Width = 100, Height = 100 };            Window window = new Window("Example", 600, 400);
            window.Clear(Color.White);            window.DrawRectangle(Color.Red, rectangle);            window.Refresh();            SplashKit.Delay(5000);            window.Close();        }    }}
// Top Level Codeusing SplashKitSDK;using static SplashKitSDK.SplashKit;
Rectangle rectangle = RectangleFrom(100, 100, 100, 100);Window window = OpenWindow("Example", 600, 400);
ClearWindow(window, ColorWhite());DrawRectangleOnWindow(window, ColorRed(), rectangle);RefreshWindow(window);Delay(5000);CloseWindow(window);The two code blocks here are functionally identical, but highlight some key differences between top level code and OOP code.
Notice in the OOP code, we create the rectangle and window objects, and then perform the drawing
of the rectangles through the objects’ methods. In the top level code however we are calling
functions and passing in the object as parameters.
Another key difference here, in OOP we call the color class Color and specify the colour we want
via the member Red whereas in Top Level code we call the function ColorRed().
Converting from Top-Level Statements to OOP
To convert from top-level statements to OOP, follow these steps:
-
Add a Namespace and Class:
Wrap your code in a namespace and class with a
Mainmethod. -
Adjust the
usingDirective:Replace
using static SplashKitSDK.SplashKit;withusing SplashKitSDK;. -
Prefix SplashKit Functions:
Add
SplashKit.before each SplashKit function.
Example Conversion
Top-Level Code:
using static SplashKitSDK.SplashKit;
WriteLine("What is your name?");string name = ReadLine();
WriteLine("Hello, " + name + "!");
Converted to OOP:
using SplashKitSDK;
namespace WriteLineExample{    public class Program    {        public static void Main()        {            SplashKit.WriteLine("What is your name?");            string name = SplashKit.ReadLine();
            SplashKit.WriteLine("Hello, " + name + "!");        }    }}
Converting from OOP to Top-Level Statements
To convert from OOP to top-level statements:
-
Remove Namespace and Class Wrapping:
Delete the
namespaceandclassdefinitions along with theMainmethod. -
Adjust the
usingDirective:Replace
using SplashKitSDK;withusing static SplashKitSDK.SplashKit;. -
Remove the
SplashKit.Prefix:Directly call functions like
WriteLine()andReadLine().
Example Conversion
OOP Code:
using SplashKitSDK;
namespace WriteLineExample{    public class Program    {        public static void Main()        {            SplashKit.WriteLine("What is your name?");            string name = SplashKit.ReadLine();
            SplashKit.WriteLine("Hello, " + name + "!");        }    }}
Converted to Top-Level Statements:
using static SplashKitSDK.SplashKit;
WriteLine("What is your name?");string name = ReadLine();
WriteLine("Hello, " + name + "!");
Quick Reference
Top-Level to OOP:
-
Replace
using static SplashKitSDK.SplashKit;withusing SplashKitSDK;. -
Wrap code in:
namespace FunctionNameExample{public class Program{public static void Main(){// Code here}}} -
Prefix SplashKit functions with
SplashKit..
OOP to Top-Level:
-
Replace
using SplashKitSDK;withusing static SplashKitSDK.SplashKit;. -
Remove
namespace,class, andMainmethod wrappers. -
Remove
SplashKit.prefixes.
Using this guide, you can quickly convert between top-level statements and OOP formats in SplashKit tutorials, making the code accessible for different programming preferences.