
How to Create a Pull Request
How to Create a Pull Request
This guide provides a step-by-step process for creating a pull request (PR) in the SplashKit Starlight repository, PRs are the primary way to contribute changes to the project. By following these steps, you can submit your own PRs and collaborate with other team members effectively.
-
Check for Upstream Branches
Before creating a pull request, it’s important to ensure that your local repository is connected to the correct upstream repository. The upstream repository is the original repository from which your fork was created. You need this connection to pull in the latest changes from the main project.
To check if upstream branches are already linked to your local repository, run the following command:
Terminal window git remote -vThis will display a list of remote repositories linked to your local repository. If the
upstreambranch is not listed, you will need to add it in the next step. -
Add Upstream Branches (if not present)
If the upstream branch is not already added, you can manually add it to your local repository. This ensures you can fetch and merge changes from the main repository whenever necessary.
To add the upstream branch, run the following command, replacing
<repo-name>with the actual name of the repository you’re working with (e.g.,splashkit.io-starlight).Terminal window git remote add upstream https://github.com/thoth-tech/<repo-name>.gitExamples
-
For the
splashkit.io-starlightrepository, the command will look like this:Terminal window git remote add upstream https://github.com/thoth-tech/splashkit.io-starlight.git -
For the
splashkit-corerepository, the command will look like this:Terminal window git remote add upstream https://github.com/thoth-tech/splashkit-core.git
-
-
Verify Upstream Branches
After adding the upstream branch, verify that it has been added correctly by running the following command again:
Terminal window git remote -vYou should see something like this:
Terminal window origin https://github.com/YOUR-USERNAME/splashkit.io-starlight.git (fetch)origin https://github.com/YOUR-USERNAME/splashkit.io-starlight.git (push)upstream https://github.com/thoth-tech/splashkit.io-starlight.git (fetch)upstream https://github.com/thoth-tech/splashkit.io-starlight.git (push)If the upstream branch is correctly listed, you are now ready to create your pull request.
Sync Your Fork (Optional but Recommended)
Before creating a pull request, it’s good practice to sync your local fork with the upstream repository to ensure you’re working with the latest version. Run the following commands to fetch and merge the latest changes from the upstream repository:
git fetch upstreamgit checkout maingit merge upstream/mainThis ensures that your pull request will not conflict with the latest updates made by others.
Creating a Pull Request
There are two primary ways to create a pull request: using the GitHub website or the GitHub Pull Requests extension in VSCode.
Using the GitHub Website
-
Open GitHub to Review the Pull Request
Head to GitHub and navigate to your forked repository. Once there, click on the Pull requests tab at the top of the page, and then click the New pull request button.
-
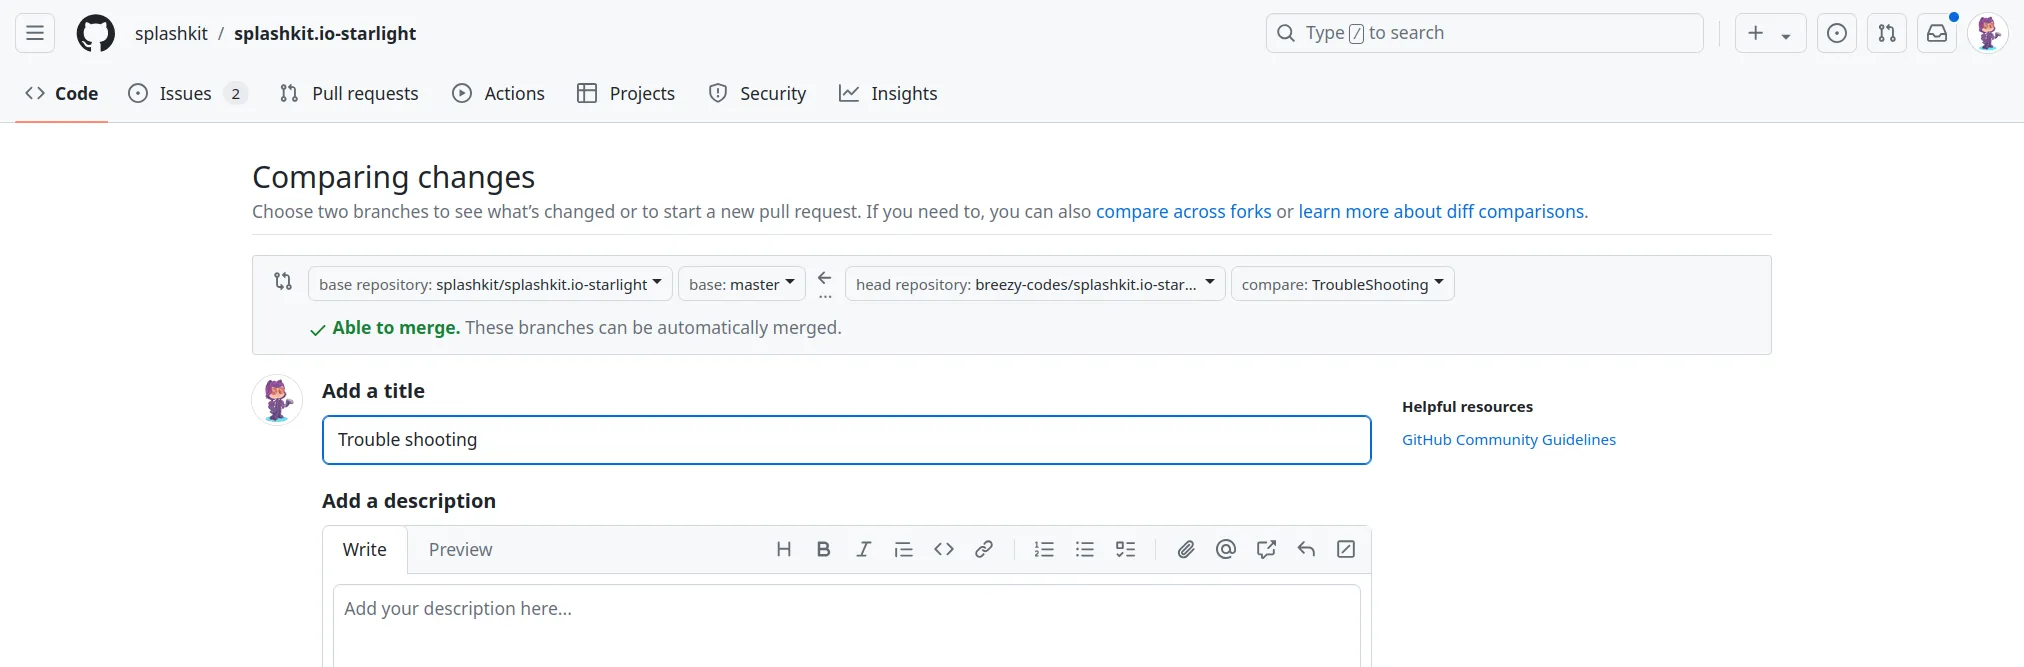
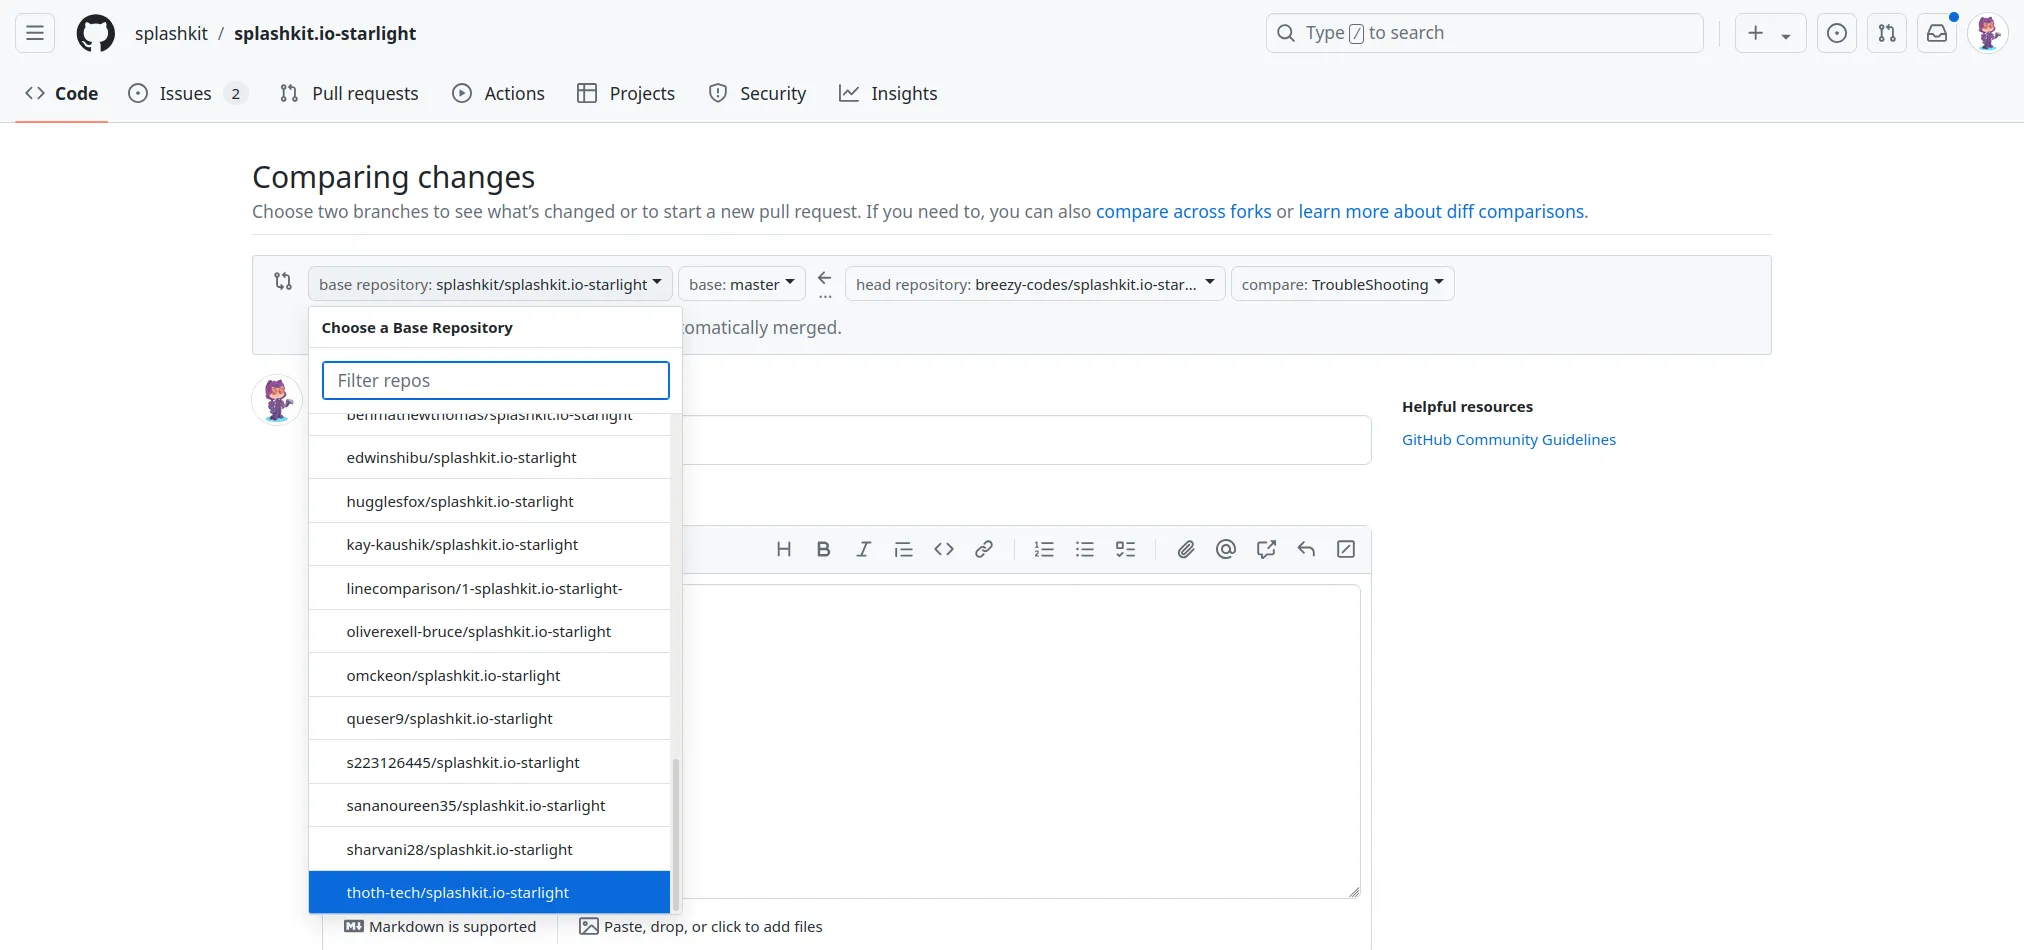
Select the Correct Repository and Branches
Next, make sure you’re comparing the correct branches:
-
Base Repository: This should be set to
thoth-tech/repo_name(the original -
repository you’re contributing to).
-
Base Branch: Select
mainas the branch to merge into.
The other dropdown should show your forked repository and the branch you want to merge from.
Ensure these settings are correct to avoid submitting changes to the wrong branch or repository.
-
-
Review Your Changes
GitHub will display a comparison of the changes between your branch and the
mainbranch of the upstream repository. This is your opportunity to double-check the modifications you’re proposing to merge.Make sure everything looks correct before proceeding.
-
Add Pull Request Details
When you create a pull request, you’ll need to provide some additional information using a pull request template. This helps reviewers understand the context of your changes. Make sure to:
- Provide a clear and descriptive title for your pull request.
- Fill out the required fields in the template, such as the purpose of the changes, testing steps, and any additional notes.
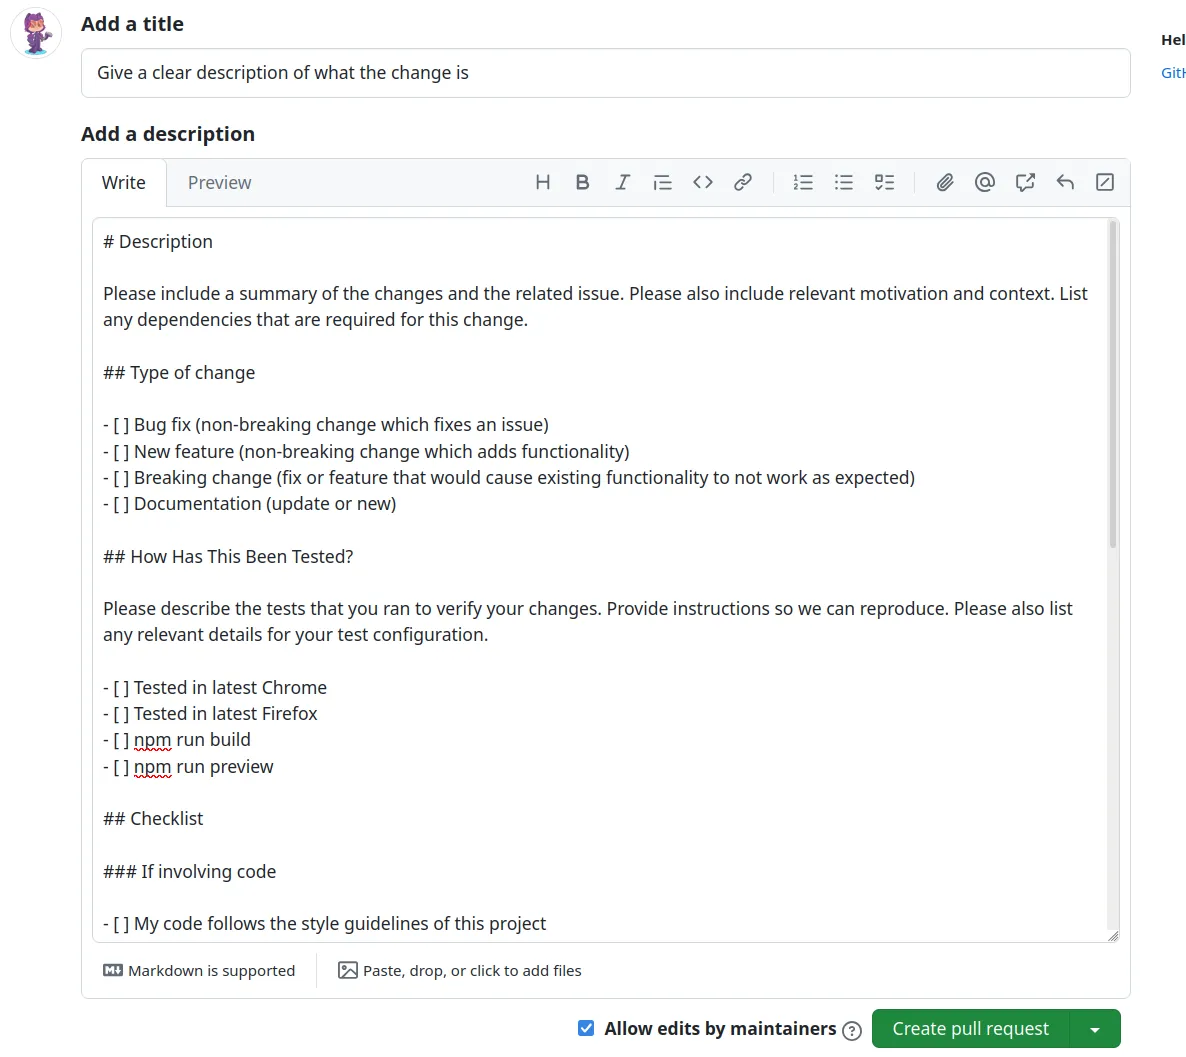
Be as detailed as possible. This makes it easier for reviewers to understand your contribution and provide feedback.
-
Submit the Pull Request
Once you’ve filled out the template and confirmed your changes, click the Create pull request button. Your pull request will now be submitted and visible to the repository maintainers and reviewers for feedback.
Using the GitHub Pull Requests Extension in VSCode
Alternatively, you can use the GitHub Pull Requests extension for VSCode. This allows you to create pull requests directly from your code editor.
-
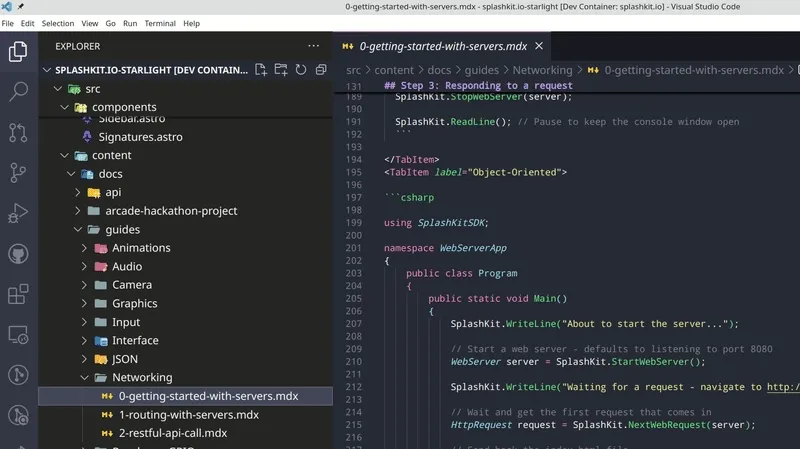
Open the Extension
In VSCode, click on the GitHub Pull Requests icon in the sidebar. If you don’t see it, you can install it from the Extensions Marketplace.
-
Create the Pull Request
Click the Create Pull Request button, which will give you the option to select the branch you want to merge from (your working branch) and the branch you want to merge into (usually
main).Follow the same steps as on the GitHub website to review your changes, fill out the pull request template, and submit it.
Next Steps After Submitting a Pull Request
Once your pull request is submitted, move the associated Planner card to the First Peer Review column in your project management tool, and share both the pull request and the Planner card with your team or peer reviewers. Follow the information on the Planner Board Etiquette page to ensure a smooth review process.
Keep an eye out for feedback from the reviewer, and be prepared to make changes if necessary.
Useful Links
- Pull Request Template: The template for creating a pull request for SplashKit team.
- Peer Review Guide: The guide on how to perform a peer review within the SplashKit team.